Recipe: Chicken and Veggie Medley

Chicken and Veggie Medley

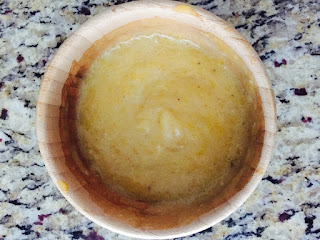
This is another one of my crock pot favorites because well, it's super easy to make and it's delicious. Once you are thinking about introducing meats, this is a great starter. I know of many people who will boil chicken for babies, but to me, this is even better because you don't lose as many nutrients in the process.

Ingredients:
6 chicken breasts
4 potatoes
6 carrots
3 head of broccoli
1 zucchini

Wash and peel all of your vegetables and cut them up. I kept the skin on the zucchini but washed it really well.
 

Here I used a crock pot liner, it's just nice to not have juices all over and the clean up is a piece of cake!


I scattered some potatoes on the bottom of the crock pot and placed the chicken on top of that. Lastly, I added the rest of the veggies. I didn't use any spices for the first few times I've made this, but now I will occasionally add a dash of the spices that we use.

I cook it on high for 4 or 6 hours, depending on how much time I have. I always check the temp on the inside of the chicken because chicken kind of grosses me out. Anyway, then you can blend as needed. I always use bottled water to dilute a bit, but that's because our tap water here is so hard. This will yield a lot, so make sure to have lots of containers handy. Also, since there's broccoli, it may get a bit stinky when re-heating.

Recipe: Baby Beef Stew

 Baby Beef Stew
Our little man is a true lover of meat and potatoes, just like his mommy. Since I've been working, I've been all about trying to save time and found that the crock pot is the answer. It's been a lifesaver! Here's our super delicious and protein-filled recipe for super easy beef stew.

Ingredients:
4 large russet potatoes
6 carrots
1 onion
1 chuck roast or sirloin (2-3lbs)
1/4 cup of water 
(2-3 zucchini's if you wanted to make it more colorful)

Add all ingredients to crock pot and cook on high for 6 hours. I may not be a great cook because I love cooking everything on high, but it really makes a difference in the tenderness of the meat in this case.


I've noticed that usually babies try turkey, then chicken, then beef. We started with chicken and veal and then did beef. We began offering meats after veggies and fruits at about 7 months.
The first few times I made it, I didn't use any spices. Now that Max is 13 months, I add a half a package of the Lipton Onion Soup to the Mix and sometimes a couple cloves of garlic.

Then comes the more time consuming part - blending. One roast usually yields a lot - roughly 70 oz of beef. I usually transfer to a large glass bowl and make the first portion fresh. Then, after he goes to bed, I blend the rest using some water to make it less thick. I then freeze the rest and reheat either in hot water (I've almost abandoned that entirely) or in a glass bowl in the microwave. We love this recipe because it's delicious, easy to make, and yields a ton! Max will usually eat 4-6 oz for dinner and loves it!

Also, if you have cleaning out the crock pot afterwards, I'd recommend using the Slow Cooker Liners. They're great and unfortunately, I run out all the time. There's less mess to clean up and you can just transfer the bag into a large glass bowl until the stew cools.


Recipe: Kiwi, Banana, Avocado Blend - Stage II

Recipe: Kiwi, Banana, Avocado Blend


I haven't posted in forever because well, work happened. Lots of work and stuff. However, now that I have some free time, I figured I'd share some of the recipes we've come up with over the last few months. This one became one of our favorites!

Ingredients:
1 banana
1 kiwi (we buy the Mighties)
1 avocado (or half)


This is super simple. Just chop up a banana, scoop out (or peel) the kiwi, and add in an avocado half (or whole)! Voila! Max will usually eat the whole portion, but you can also add some oatmeal cereal and substitute for an avocado half or a half of a banana. Note: since there's a banana and avocado, this does not keep well, if not used right away.

Making Stage Two (Stage 2) Baby Food - Green Beans (Steamed)

As Lean as a Green Bean 
Now on to our second légume - the green bean. I'm reverting back to my fhransaize vocabulary. Just kidding, but really. Apparently legumes and vegetables are different foods but in French, the word for vegetable is legume...riddle me that!

Since the massive frozen food recall that has given me nightmares, I purchased my green beans in a cute little bag, fresh, and not organic. I'm sad to report that there was not an organic option at Sprouts....but I must thank them for not using the CRF facility. I steamed these for a little bit longer so that they get extra mushy.


1). Wash the green beans, bring about two cups of water to a boil. You can  chop off the ends/stems of the green beans and steam for about 20 minutes.


2). Cool (and if you're like me, chop off the ends). They look so pretty! Why do they smell like peas to me?

3). Blend (for just a little extra, since the skins are kind of tough)! I added just a splash of water, but they're already pretty watery.

4). Voilà! I pureed what felt like forever, but the green beans were still a bit chunky. I suppose that's why they're a stage 2 food.

Note: A bag of green beans yielded about 24 oz of puree. 

Oh, almost forgot, I haven't posted one of these in a while...

Pup #1 

Pup #2


My pups loved green beans WAY more than Max, that's 'cause we did Doggie-Led Weaning, jk. I found that mixing the green beans with another sweet favorite such as sweet potatoes or squash helped smooth the consistency and probably add a bit of sweetness.


Making Stage Two (Stage 2) Baby Food - Peaches (Baked)

I was pretty excited to finally try peaches for my little peach. Peaches ARE on the 'dirty dozen' list, so I purchased organic. If you've been following this blog, you may have noticed that I mention the 'dirty dozen' a fair amount, but I don't want to come off as too negative so, check out the 'clean fifteen' (fruits and veggies that are NOT chock full of contaminants).

Picking out peaches: I know this is probably redundant, but if you did not grow up picking fruit, it might be helpful. When choosing peaches at the store, pick ones that are a rosy and evenly colored. Since peaches may be hidden from sunlight by leaves, pick ones that have had good sun exposure. Lastly, the peach should not be mushy soft to the touch, but also not too firm.
After looking at various recipes, I chose to bake the peaches instead of steaming them. I tasted one and it was a bit tart, so I figured that baking would help lock in the sweeter flavor. Steaming is definitely faster.

1). Clean your cooking area and wash your fruit. The photo below summarizes why I'm so crazy about washing my fruits and veggies...I feel like fruit skins might as well be covered in edible glue. So annoying! (Just run it under warm/hot water and it will come off.) Obviously I'm worried about pesticides....but those aren't as visible as these neon stickers, haha.


2). Preheat oven to 400°.


3). Cut peaches in half. Just follow the seam along the fruit and pry open, I mean, separate the halves by twisting. Have you ever had a knot in your yo-yo and were forced to try to get it out from between the halves? Well, to me, separating peaches is exactly like trying to separate a yo-yo by twisting it...while also being super sticky, and did I mention %$#&&*ing impossible?

4). Pit the peach (even more difficult than yo-yo-ing it)...I would skip this step until the peaches are baked.
NOTE: Seriously, wait until it's done baking...unless you enjoy muttering swear words under your breath for 15 minutes.  Once baked, the stone just falls right out! However, if you know of a great method to remove the stone, please share in comments.

Can you tell which halves got 'Lennie Small-ed?'
Yes, that was tots Of Mice and Men reference.

5). Place the halves stone half down in a baking dish and add 3 cups of water.

6). Bake peaches for about 40 minutes. The skin will prune a bit.

7). Remove the skins and stones, if you haven't already. NOTE: You can leave the skins on and blend, but it won't puree as well as the 'meat' of the fruit. If I was cooking for a baby under 6 months, I would remove the skins. I did half and half...I got lazy peeling the skins off, haha. I'm not as meticulous now as I was at first.

8). Blend, add very little to no liquid. I added just a splash of the liquid the peaches baked in.

9). Enjoy!


Baby-Led Weaning (BLW) Update:
For those trying BLW or using peaches as finger food, this would theoretically be a great food to try.
I took off the skin and cut up a peach half in little pieces. Max had no difficulty grasping it and throwing it at the WALL, but very little to none ended up in his mouth. He's so coordinated, that he just chose to impress the dog with his 'feeding' abilities and now the dog basically lives next to the high chair. Oh, well! We'll try again later!


Oh yea, peaches stick to walls WAY better than decals.

Stage 2 Baby Food Blend - Peach & Avocado Puree

As promised, here's the peach & avocado blend 'recipe'. Max loved this blend! The tanginess of the peaches was offset by the creamy avocado. Two delicious fruits blended into one = yummy breakfast!

I used one small avocado and a 2oz peach blend I made earlier. I didn't think Max would eat all of it, but he munched it! 

The blend came out looking more avocado-like, rather than peach-y. I'm guesstimating that it yielded about 4oz of food.

Stage 2 Baby Food Blend - Peach & Banana Puree

NOTE: Please use this recipe once your little one has tried at least one (or both) of these fruits without a reaction.

This turned out to be a great no cook recipe blend. The peaches I baked had a tangy aftertaste, so I figured it would be a great fruit to mix with a little something-something. I'm also thinking that peach and avocado would go well together, too. Stay tuned! We're trying it tomorrow.
I already had some baked peaches I made earlier and one ripe banana. Simply mix the two, and enjoy!
It actually is a great consistency, too. The baked peaches were very soft and the bananas had a few tiny chunks, so they paired together very nicely. 

Snack Time is Fun Time (and Learning Time)

Snack Time: When, Where, How?
To me, snack time is truly learning time. I'm a teacher. I teach big kids (well, university to be exact) but I've noticed that learners of all ages learn best when they forget that they're learning because they are enjoying an activity. Unfortunately, for 'big kids' and even adults the best way to get them to learn is to somehow trick them into thinking they're having fun (works on husbands as well). I spend so many hours trying to figure out how to provide this 'educational form of entertainment', but with babies it's so easy, they think everything is fun! Thus, 'snack' time, to me, isn't necessarily about filling the baby's belly but more about developing and perfecting fine motor skills and observing how learning takes place.

It's so exciting to find and try new snacks for baby. We started with the rice puffs, we use both Gerber Graduates Puffs and Plum Organics Super Puffs (the Plum Organics are gluten free, but I wanted Max to have some exposure to gluten, so we are trying everything). These make great dog snacks, too! ;)


However, for us, our ultimate favorite are the Happy Baby Organic Yogurt Snacks. Here are some of the main reasons we love Yogis: (1) they are dime-sized and easier for baby to pick up, (2) they dissolve very quickly (choking is not an issue), (3) they have a probiotic, which is supposed to help with digestion. We bring these with us when we go out and they're just great. I give him about a half a serving (~12) pieces and he just plays, eats, holds them and stays relatively quiet.

Max is now 8 months old and just last week he cut a tooth (and then another one a couple days later)! It sounds like an achievement, but he was miserable. He's normally so happy, but it seemed like someone replaced my happy baby with someone who is as likable as Joffrey on Game of Thrones (unlike Joffrey, he's was still super cute and lovable). Anyway, it seemed like the Plum's Little Yums Cookies provided his some relief. Unfortunately, my other cookie monster (the dog) ate most of them. Max is so good at feeding animals...we'll have no problems when we finally go to the petting zoo.

NOTE: Here's some things that we found helped Max get some teething pain relief; nuby teethers (for like 4 minutes), a silicone basting brush, silicone spoon holder, cool washcloth, and a baby toothbrush (currently the top hit).

When?
Usually, I treat snacks like I would a salad at a restaurant. I give Max a handful of puffs or yogis while I'm getting his meal ready. He sits in his high chair and eats some, throws some, feeds the dogs some, etc. It does not interfere with his appetite. This arrangement works well for us.
During the semester, while I was teaching, he would sometimes get a little snack in the stroller with his babysitter. Again, it never seemed to interfere with breastfeeding, nor his meals.
Lately, since he's been teething so badly, I've been giving him a little cookie after dinner to eat, but it's more about the sucking and rubbing it on his gums than eating.


Baby Led Weaning (BLW) - Asparagus

Baby-Led Weaning
I've read a bit about it and I decided to give it a go. I don't quite understand why you can't do both, but hey, that's not for me to argue about. I'm just going to do both. My reasons for trying it? I wanted to see what my kid was going to do with cooked asparagus, and I have to tell you, it's quite funny.
My husband was sketched out and initially, said that he was against it but warmed up to the idea. Well, while I was texting him, he said, "Do whatever you want." That's a 'yes', right?
If you own a kindle, there are a ton of books on the topic. If you have Kindle Unlimited, there are about three decent books you can download.
Right now, I'm reading the following:
A Practical Guide to Baby Led Weaning: A Brief and Empirically-Supported Method for Introducing Solids to Your Baby
A Mom's Practical Guide to Baby-Led Weaning
Baby-Led Weaning: A Simple Step-by-Step Guide to Baby-Led Weaning (can't find a link, the cover is pink)

The one that seems to be the most popular one is titled, Baby-Led Weaning and they also have a website. The non-conformist that I am, I haven't purchased it yet. Also, I love this wholesomebabyfood site for pretty much everything - best website ever...ever.

Anyway, I pureed some asparagus, but I saved four spears for Max to try. I put them into his bowl and watched him carefully (except for when I had to shoo the dogs away because he tried to feed them his food). Here's what he did:

1). "Cool! Toys!"
(He had just woken up from a nap and wasn't super happy yet. He gets it from me.)

2). "Um, mom, where's the puree? I'm looking, but I don't seem to see it."

3). "That's cool, I'm just going to play with it again."


4). "K, well, maybe I'll eat it, but only if I can do it out of BOTH hands at the SAME time."


In conclusion, he sucked off the tops and the dogs ate the rest because they all ended up on the floor. It was pretty entertaining though! We will definitely try again after I purchase an egg cutter.

Making (Stage 2) Baby Food - Asparagus (Steamed)

I know you're all dying to know...did asparagus make my baby's pee smell weird? I don't know, I forgot to check I was too distracted by another issue - constipation! It looked like he pooped green beach pebbles...poor guy!

I cooked just one bunch of asparagus, just to try. I've been reading a lot about BLW (Baby Led Weaning) and said, "What the heck, I'm going to try it." My husband doesn't seem too excited about a second baby (yet), so I'll do the most I can with this one. Also, my husband is definitely not excited about baby led weaning because he thinks LO will choke. Well, I have been 'certified' by the American Red Cross in infant first aid and CPR, so...yeah, I'm going with it #hubbydontreadthis. I will post some pics/video of how our first time turned in another entry.

If you buy an asparagus bunch but choose not to use it that day, wrap the stems in a moist paper towel, or you can even stick the stems in some water. I've read that it's good for about 3-4 days in the refrigerator. My husband LOVES asparagus with lemon and garlic salt, so I cooked Max's as we do ours - save the salt and lemon.

1). Clean your cooking area and wash the asparagus. I went with the 'skinny' asparagus, I like it better than the thicker ones. Plus, they cook faster. Asparagus is not on the 'dirty dozen' list and I did not purchase this organic (I don't think).


2). I think there's some 'bendy' trick you can do, but I just chop half of the asparagus stem off and throw it away. I did a little extra for Max because the closer you get to the bottom, the tougher it is to chew, gnaw, whatever.

3). Bring about three cups of water to a boil, add the asparagus, and cover with lid.

4). Steam for about 15-20 minutes or until the asparagus is soft. Since it was my first time trying BLW, I steamed for the full 20 minutes and checked made sure it was soft throughout. Mine looked like limp green noodles...ahem, that's official cooking terminology for ya ;)

5). Blend! I blended with a bit of breast milk in an attempt to sweeten it up. You can also save some of the liquid that you cooked it in, since the asparagus was fully submerged in the liquid and use that instead. You won't need a lot, maybe and ounce or two.

6). Voilà! Delicious asparagus mush! (Mine came out a bit runny because I accidentally dumped in too much milk.)

One bunch of asparagus yielded 6oz of puree for me (that's with a bit too much liquid). I served it with some sweet potato and it was a hit!

Stage 1 Baby Food Blend - Avocado & Banana

NOTE: Please use this recipe once your little one has tried at least one (or both) of these fruits without a reaction.

If you've been following this blog, you will know that these are my two favorite foods to waste in bulk. However, they are super easy to prepare (note I said prepare, not cook, yay!), but are best prepared right before serving.

I used half of a banana and a half of an avocado to make about 3-3 1/2 oz of puree.
1). Peel half a banana and a half of an avocado.

2). Chop the banana into rings and slice/chop the avocado.

3). Blend & let baby enjoy!

My husband was home when I made this and told me that he would never eat the two together, so naturally, I made him taste some. His words, "Pretty good...tastes like a fatty banana." Max pretty much inhaled it, we didn't even have to wash his hands because there was no mess.

Making Stage 1 (Stage 1) Baby Food - Bananas (Uncooked)

You know the English saying, haste makes waste? Well, in Russian it's a bit more demoralizing, they say, 'If you rush, you'll be a laughing stock.' (Поспешишь -- людей насмешишь.) Go ahead, laugh it up...I can't see you.
When I think of baby food, I think of pureed bananas. Then why the *bleep* is it so hard to preserve them? I don't know...stupid oxygen. They're way worse than avocados when it comes to oxidizing. I wasted a bunch of bananas because I didn't read ahead, nor did I think it through, #mybrainispuree. How many bananas you ask? This many...NBD.
I read that people can freeze bananas, even banana halves...but for me, they still turned brown and gross, and I ended up tossing them. The mommies in the mommy group I'm part of say that they cut up bananas, place them in the freezer, and then make ice cream! Sounds delish...I'm too embarrassed to ask if it's brown. I'm just gonna avoid that one for a while.
After all that, I think it's best to buy as you go when it comes to bananas. I have been cutting up a half to puree for Max and eating the other half. It's a win-win! You do not have to cook bananas. I have not tried to steam them, I'm assuming they will turn brown in about five seconds, haha. Just chop them up, blend, and serve (super fast before they oxidize)!


Or you can do the following (this is where you can laugh)....

Step 1). Peel the skins, cut, and blend.

Step 2). Take the time to put them into their pretty little silicone trays.
Step 3). Consider placing plastic wrap on trays to salvage two pounds of banana.

Step 4). Place directly into trashcan.

Step 5). Leave them in the freezer for a week because you are mad and refuse to spend the fifteen minutes it will take to clean & sanitize everything. I'm still not over it. 

Making Stage 1 (Stage 1) Baby Food - Peas (Steamed)

Ugh, peas. I have bad memories associated with peas. Here's why...when I was a kindergartner in what one of my students called, 'Soviet occupied Ukraine' (haha, this still cracks me up! I knew it just as USSR), lunch consisted of two courses. Every so often, the 'first course' was pea kasha (not buckwheat, just mashed peas or something). I HATED it. The lunch lady would make you eat ALL of it in order to get the second course. One time, I remember going up and telling her that I couldn't eat it and she told me to go sit down and finish it. I went up again and told her I didn't want to eat it, and she told me to take two more bites...I took a bite, gagged, and started crying. That was the end of that, I never had to eat pea kasha ever again! Score! I'm pretty sure they didn't tell my parents though.

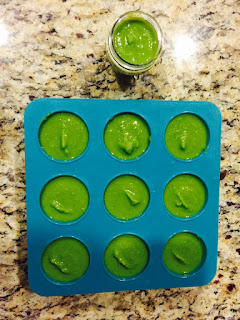
Well, I finally reached the end of my Stage 1 list and the only veggie left is peas, so here we go! Please learn from my mistakes, just buy frozen peas (maybe organic if you want to make yourself feel better, like me) and NOT fresh peas. I will show you why.

While I was at the store I picked up about a half a pound of fresh peas (I emptied the bin and all I got was a half a pound) and then I thought about how little peas there actually are in there....so I walked over to the frozen section and found some perfectly acceptable frozen peas.
Here's 1 pound  of frozen peas (yield=20oz):


Here's the half a pound of fresh peas (unshucked) (yield=1oz)
Also, it took me a good 15 minutes (at least) to shuck the pods. I guess when they said, "Two peas in a pod." They meant that there are LITERALLY two peas in there. This might be a great activity for LO that are a bit older, they might like it...or this can also be one of those tasks Cinderella's evil step mother made her do.

But they're so pretty!
.

Ok, enough of that, here's the actual recipe.

1). Wash your cooking area and bring about 4 cups of water to a boil (make sure to keep the lid on the pot). If you are not using breastmilk, or formula keep the leftover water (decoction) to blend with. Peas are so small and have tough skins and I've read that it is difficult to get a smooth puree out of them, but mine turned out alright.

2). Steam the peas for about 15-20 minutes, or until soft. I steamed them for a bit longer than what was listed on the package instructions, to make sure the skins were thoroughly .

3). Keep some of leftover liquid to blend with.

4). Blend! Yum, #jklol #peasaregross!

5). The 1lb bag of peas yielded 20oz of food:

Here's my sad little bundle of fresh peas, steaming away into nothing-ness:

And an even more pathetic yield (HALF of the 2oz baby bullet container):
.

NOTE: Max liked the peas. Maybe I'm crazy, but I thought that they weren't that sweet (kind of like avocados), so when I offered it to him on the second day, I added a couple of baby spoons of sweet potatoes and (it made me feel WAY better) he ate them right up. Again, #FTMinsecurities.