Showing posts with label Stage 1. Show all posts

Stage 1 Baby Food Blend - Avocado & Banana

NOTE: Please use this recipe once your little one has tried at least one (or both) of these fruits without a reaction.

If you've been following this blog, you will know that these are my two favorite foods to waste in bulk. However, they are super easy to prepare (note I said prepare, not cook, yay!), but are best prepared right before serving.

I used half of a banana and a half of an avocado to make about 3-3 1/2 oz of puree.
1). Peel half a banana and a half of an avocado.

2). Chop the banana into rings and slice/chop the avocado.

3). Blend & let baby enjoy!

My husband was home when I made this and told me that he would never eat the two together, so naturally, I made him taste some. His words, "Pretty good...tastes like a fatty banana." Max pretty much inhaled it, we didn't even have to wash his hands because there was no mess.

Making Stage 1 (Stage 1) Baby Food - Bananas (Uncooked)

You know the English saying, haste makes waste? Well, in Russian it's a bit more demoralizing, they say, 'If you rush, you'll be a laughing stock.' (Поспешишь -- людей насмешишь.) Go ahead, laugh it up...I can't see you.
When I think of baby food, I think of pureed bananas. Then why the *bleep* is it so hard to preserve them? I don't know...stupid oxygen. They're way worse than avocados when it comes to oxidizing. I wasted a bunch of bananas because I didn't read ahead, nor did I think it through, #mybrainispuree. How many bananas you ask? This many...NBD.
I read that people can freeze bananas, even banana halves...but for me, they still turned brown and gross, and I ended up tossing them. The mommies in the mommy group I'm part of say that they cut up bananas, place them in the freezer, and then make ice cream! Sounds delish...I'm too embarrassed to ask if it's brown. I'm just gonna avoid that one for a while.
After all that, I think it's best to buy as you go when it comes to bananas. I have been cutting up a half to puree for Max and eating the other half. It's a win-win! You do not have to cook bananas. I have not tried to steam them, I'm assuming they will turn brown in about five seconds, haha. Just chop them up, blend, and serve (super fast before they oxidize)!


Or you can do the following (this is where you can laugh)....

Step 1). Peel the skins, cut, and blend.

Step 2). Take the time to put them into their pretty little silicone trays.
Step 3). Consider placing plastic wrap on trays to salvage two pounds of banana.

Step 4). Place directly into trashcan.

Step 5). Leave them in the freezer for a week because you are mad and refuse to spend the fifteen minutes it will take to clean & sanitize everything. I'm still not over it. 

Making Stage 1 (Stage 1) Baby Food - Peas (Steamed)

Ugh, peas. I have bad memories associated with peas. Here's why...when I was a kindergartner in what one of my students called, 'Soviet occupied Ukraine' (haha, this still cracks me up! I knew it just as USSR), lunch consisted of two courses. Every so often, the 'first course' was pea kasha (not buckwheat, just mashed peas or something). I HATED it. The lunch lady would make you eat ALL of it in order to get the second course. One time, I remember going up and telling her that I couldn't eat it and she told me to go sit down and finish it. I went up again and told her I didn't want to eat it, and she told me to take two more bites...I took a bite, gagged, and started crying. That was the end of that, I never had to eat pea kasha ever again! Score! I'm pretty sure they didn't tell my parents though.

Well, I finally reached the end of my Stage 1 list and the only veggie left is peas, so here we go! Please learn from my mistakes, just buy frozen peas (maybe organic if you want to make yourself feel better, like me) and NOT fresh peas. I will show you why.

While I was at the store I picked up about a half a pound of fresh peas (I emptied the bin and all I got was a half a pound) and then I thought about how little peas there actually are in there....so I walked over to the frozen section and found some perfectly acceptable frozen peas.
Here's 1 pound  of frozen peas (yield=20oz):


Here's the half a pound of fresh peas (unshucked) (yield=1oz)
Also, it took me a good 15 minutes (at least) to shuck the pods. I guess when they said, "Two peas in a pod." They meant that there are LITERALLY two peas in there. This might be a great activity for LO that are a bit older, they might like it...or this can also be one of those tasks Cinderella's evil step mother made her do.

But they're so pretty!
.

Ok, enough of that, here's the actual recipe.

1). Wash your cooking area and bring about 4 cups of water to a boil (make sure to keep the lid on the pot). If you are not using breastmilk, or formula keep the leftover water (decoction) to blend with. Peas are so small and have tough skins and I've read that it is difficult to get a smooth puree out of them, but mine turned out alright.

2). Steam the peas for about 15-20 minutes, or until soft. I steamed them for a bit longer than what was listed on the package instructions, to make sure the skins were thoroughly .

3). Keep some of leftover liquid to blend with.

4). Blend! Yum, #jklol #peasaregross!

5). The 1lb bag of peas yielded 20oz of food:

Here's my sad little bundle of fresh peas, steaming away into nothing-ness:

And an even more pathetic yield (HALF of the 2oz baby bullet container):
.

NOTE: Max liked the peas. Maybe I'm crazy, but I thought that they weren't that sweet (kind of like avocados), so when I offered it to him on the second day, I added a couple of baby spoons of sweet potatoes and (it made me feel WAY better) he ate them right up. Again, #FTMinsecurities.


Making Stage 1 (Stage 1) Baby Food - Pears (Steamed)

I've been avoiding making peas, I have bad associations with peas. So, pears it is! This week I found that Sprouts (aka Sprouts Farmer's Market) has very inexpensive organic fresh produce options. I'm talking, like, cheaper than 'regular' produce found at groceries store. <insert gaping mouth emoji here>.

I bought these delicious looking pears, they're on the smaller side, but they look picture perfect (not kidding, check it out!). They are rosy, and yellow, and not too squishy. They looked so appetizing I bought almost three pounds worth (10 pears). Pears are not on the 'dirty dozen' (this is the NEW, updated list of dirty produce), so you do not have to buy organic, but you might want to if they look this pretty.

I read that you do not have to cook pears, so that's pretty easy. However, I just couldn't get all the chunks out with an uncooked pear, so I steamed them for about 10 minutes. It wasn't that it was too chunky for baby, but the consistency seemed very uneven to me, so the second time I chose to steam them. Also, I kept a sealed container of uncooked pear overnight in the fridge and it oxidized. It developed a brownish pink top layer and I didn't use it. I'm sure it would have been fine to use, but I just didn't.

1). Clean your cooking area and wash your fruit.


2). Peel the sticky SOBs (Slimy Oval Beauties, silly). Careful, they are SO slippery. My ten pears turned to nine because one slipped out of BOTH my hands and went directly into the trashcan. It's literally like trying to hold on to a wet bar of soap.

3). Remove the core and cut into wedges. Just as with apples and avocados, pears oxidize quickly, so they will turn a bit brown if left out.

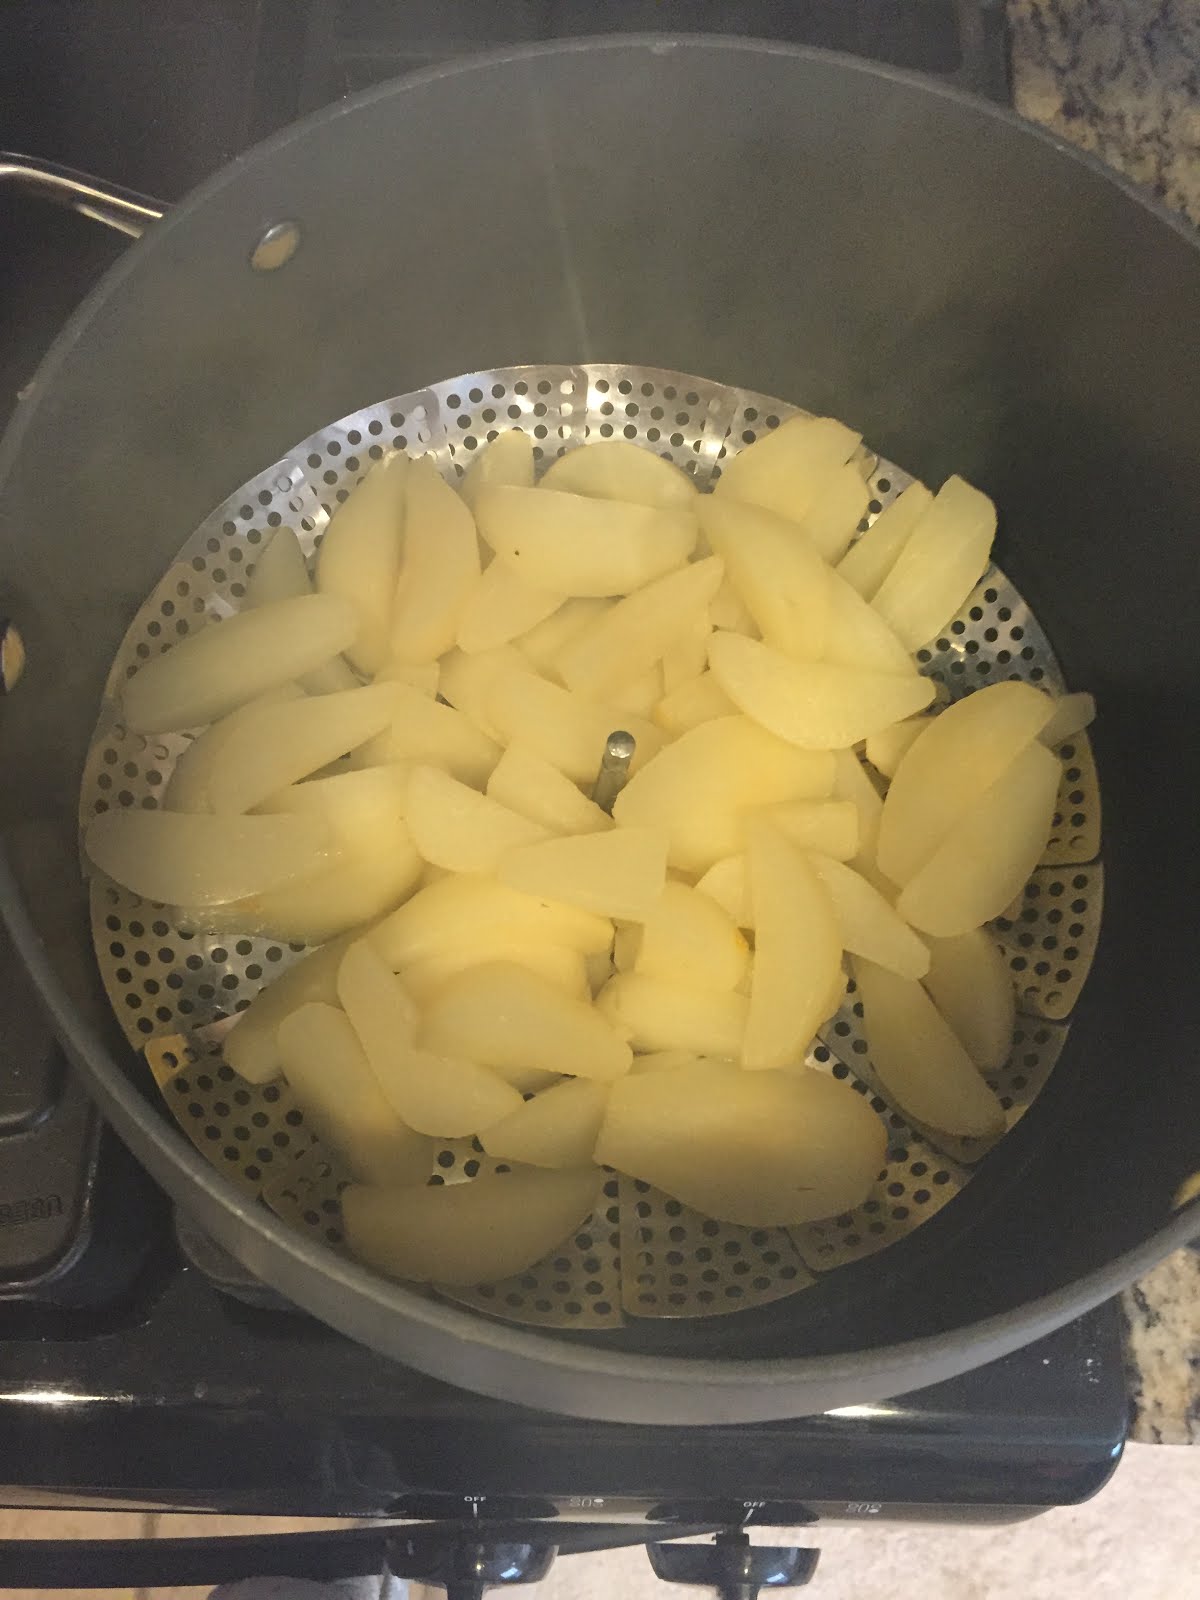
4). Place your pear wedges into a steamer with boiling water and cover with lid. I used about three cups of water.

5). Steam for about 15-20 minutes, or until soft.

6). Puree! You do not need to add any liquid, the pears contain a lot of juice and will blend nicely.

7). Like I said earlier, I used nine small pears. They yielded about 22oz of pear puree. 
     Store in the refrigerator for up to 48 hours (some sites say 72), or freeze. 


UPDATE: These suckers gave Max gas. Figures, it's a gassy food....first hit on Google.

Making Stage One (Stage 1) Baby Food - Sweet Potatoes (Oven)

A long time ago, in a restaurant far, far away...I was a waitress (and I shouldn't have been because I'm a meanie) someone asked me what a sweet potato was and I said, "An orange potato that's sweet." followed by an unintentional eye roll. I did not get a good tip from that table and you know...good for them. Apparently, I have the customer service skills of a Russian grocery store clerk. If you've ever seen Everything is Illuminated (starring Elijah Wood) you will see all that is wrong with Russian customer service (or well, lack thereof) amongst a 'few' other differences. Here's an example: Being Vegetarian in Ukraine.

Anyway, my point is that a sweet potato IS orange and IS super sweet, perfect for baby! Max's first veggie ever was sweet potato and it seems like it is still his favorite food. You do not have to buy these organic, as they are not part of the 'dirty dozen', but it's all up to you! 

I used four sweet potatoes and they yielded A LOT (about 28oz) of food. When picking out these pommes of deliciousness, you want to avoid weird bumps and discoloration. 

1. Preheat your oven to 400°.

2. Wash and scrub your taters. Even though you will not be using the skin, I like to make sure all the dirt and the filth it may have accumulated during transport is washed off. 

3. Very Important! Poke holes about a quarter of an inch around the potato. FYI: They MAY/WILL explode if you don't poke holes.

4. Wrap your sweet tots in foil, arrange on a cookie sheet, and bake at 400° for 45min. to an hour. 

5. Peel the skins off the potatoes. They will come very off easily. Note: Once the sweet potatoes have cooked, the skin will look a bit wrinkly and the potato itself will be soft to the touch and quite sticky from all the excreted sugars. Yum!

6. Blend with a liquid of your choice. I used breastmilk, it just mixes so well with sweet potatoes. Just remember, if you use breastmilk it is not recommended that you microwave when thawing. I made this batch a bit thicker, but that's because Max is growing and is getting more and more comfortable with thicker foods. Yeah...when I say 'comfortable', I mean he has learned to swallow food, haha.

7. Bon appetit, baby! (Why do I only think of French words when writing recipes???)

My little chunk gets pretty excited about sweet potatoes!


UPDATE: At 7 months and two weeks, sweet potatoes remains Max's favorite food. If I add even a tablespoon of sweet potato puree to anything, he just gobbles it right up. Lately, I've been giving him some oatmeal, sweet potato, and a bit of cinnamon and it's one of his favorites. If you plan on adding a little bit of spice to your life, don't forget to follow the four day rule just like you would when adding new foods.


Making Stage One (Stage 1) Baby Food - Zucchini (Steamed)

Zucchini 


We are on to our next squash...zucchini! Cooking zucchini is super easy and it's a great veggie to try (I guess technically, it's a fruit, but whatevs). If your baby is less than 6 months old, you may want to remove the skins from the zucchini because younger babies may have a hard time digesting the skins. However, most of the nutrients are found in the skin.

I purchased these organic and the prep is really easy!

1). Wash/clean your food cooking area and the zucchini.

2). The next step is to, cut off the tops and ends of each zucchini.


3). Toss the ends and slice each zucchini into rings.


4). I used my veggie steamer and steamed them in a cup and a half of water for about 20 minutes.


5). Simply blend! No additional liquid needed, as zucchini are pretty watery. They will freeze and look a bit watery, too.


I did not add any liquid and three zucchini's yielded about 13oz.


The one thing to keep in mind is that zucchini is pretty bland in taste. Max ate it, but he didn't LOVE it, I think it might be because it wasn't sweet enough. The next time I offered it, I mixed it with sweet potatoes, which I already know he loves and he ate it up! However, you could always mix with breastmilk or formula, and cereal.

Making Stage 1 (Stage 1) Baby Food - Avocados

Avocados 

I think this is my favorite recipe so far because there's no cooking involved! It literally takes about 5 minutes to prep and blend (or mash). Plus, avocados are basically a super food. The only downside is that I've read that avocado does not freeze well. If frozen, it may turn brown and become a bit runny. I chose not to freeze avocado. Another thing to keep in mind is that avocados oxidize quickly and turn an icky brown color, so they must be used relatively quickly or sealed air-tight.

I did not grow up eating avocados. In the post-Soviet era, there were about 8 vegetables on the market and the 'exotic' avocado was not one of them.
Here's one childhood memory: I remember that circa 1995 my dad bought a coconut for me for 'Christmas' (technically, it was New Year's, but whatever) and it was SUCH a big deal. I'm not sure which is weirder, the fact that I got fruit for 'Christmas' or that we had never seen a coconut anywhere else but TV up until that point in our lives. Just imagine, my drunk family (again, it was New Year's) trying to open a coconut with a butter knife, I mean, 'the household tool'. No one knew what to do with it. It was quite disappointing. Anyway, I'm 99% sure that I had not tasted avocado until I was at least 20.

Here's a quick avocado recipe (if I can even call it that):

Intro: Due to their thick skin and other factors, avocados are not on the 'dirty dozen' list and do not have to be purchased organic. These are not organic because well, my grocery store didn't have an organic option. Avocados should be relatively firm, but when you push on them gently they should be a bit soft. If they're too soft, they're too ripe. If they're super hard, they're not ripe enough...pretty easy, right?
I bought 4 - two that were pretty ripe and two that could sit for a couple of days.
Also, when I got home I saw this sticker...thanks Fry's for moron-proofing my shopping experience.


1). Rinse off the fruit, cut in half, and remove the pit.
                                                        
                           
2). I used my avocado slicer to remove the meat of the fruit from the shell. It is a handy little tool! I have yet to master perfect slices.
                                                    

3). Blend and serve! Mine came out a bit chunkier than I expected, but Max loved it just fine.

The next day, I used a bigger avocado and refrigerated one portion in a bullet storage container. If you cover the avocado puree with plastic wrap and make sure to expel all of the air before covering with a regular lid, it should keep in the refrigerator overnight just fine. I know that most unused baby foods can be stored in the refrigerator anywhere from 48-72 hours, but I wouldn't store avocado for longer than overnight.  
      
                    .
In conclusion, a half of one medium sized avocado yields about 3oz...just enough to be too much, haha! Figures, the one thing that's difficult to refrigerate and freezes poorly comes in quantities that a portion must be stored. 


Moving from Cereal to Veggies -or- Starting on Stage 1 (Stage 1) Veggies

I was (and still am) pretty excited to start on this whole fruits and vegetable journey. I started out by making a list of all the foods I wanted baby to try and labeled them by the 'stages'. Fun cocktail party fact, it was Beech-Nut, who initially came up with the idea of baby food 'stages'...pretty impressive, right?
Anyway, it seems that the general consensus is to start on veggies first and then move on to fruits. The reason for this is quite obvious when you think about it, humans prefer the sweet taste of fruit over veggies. However, the veggies babies start on are still pretty sweet....yes, I tasted them. I gotta say, I'm definitely not a fan of the rice cereal--it tastes like gluten-free Eggo's from TJ's, which is essentially paste #sorrynotsorry).

I have also read in several books that it is recommended to start on the yellow veggies (sweet potatoes, squash, carrots) first and move to the green vegetables (green beans, peas, etc.) second.

Here's my list of 'Stage 1' foods:
Sweet potatoes
Carrots
Squash 
Zucchini
Peas 
Avocado
Pears
Apples 
Bananas
Max LOVES sweet potatoes!
Note: One of my friends wrote down the foods her baby tried as she went along and noted the symptoms (if any) next to food to know what did and did not sit well with baby. I thought this was a great idea and have implemented this as well. It can just be a post-it you keep on the refrigerator or a complete color coded list. I fall into the latter category, again, FTM problems.

Ok, so here's the 'switch'. It's essentially the same as the post I have about starting rice cereal.
You can mix in the veggie into the cereal or provide just the veggie without the cereal during the meal. All new food introductions have a four day 'trial period', during which you should introduce the food in small amounts, watch for a reaction, and increase over the course of several days.

Day 1:
Start with 1oz of veggie (or half the jar or less of a Stage 1) in the am.
Cereal for the second meal.
If you are skipping cereal entirely, start with just one meal in the early morning and work up to two meals a day on day 3 and three times a day on on day 5+ .

Day 2:
1oz of veggie in the am.
Cereal* for the second meal.

Day 3:
2oz of of veggie in the am.
Cereal for the second meal.

Day 4+:
2oz of of veggie in the am.
Cereal* for the second meal.

*or whatever food you are on at the time

If there's no reaction on day 4, you're in the clear! You can now start offering the veggie at every meal, if you so choose, but there are so many more fun foods to try!

Note: Stage 1 baby food contains 2.5oz of food and Stage 2 has 3.5oz of food.
Note: You can play it by ear and see at what point to increase from 1oz to 2. I stuck with even numbers because my baby food containers are 2oz and I will sometimes mix with cereals.

Lastly, if you're like me , and you read all these books and then decided to introduce a THIRD food into the mix and was stumped...wait, can I give him TWO veggies in the same day? Yes, you can. Say you've introduced squash (did the four days without a reaction) and then decided to introduce sweet potatoes, you can totally continue giving your baby squash for the four days a new food is introduced. I am definitely overthinking this 'solids' thing.


Yum! (Look, he's actually opening his mouth!!)
    
Meanwhile, right next to me is this....

How does this even happen???